In a search to replace several NetGear WNCE2001 devices which had over time, proven themselves to be so unreliable they would literally kill entire wireless AND wired networks by randomly hijacking DHCP. I tried many devices — some either couldn’t bridge at all, others ‘worked’ but had such terrible range or connection quality they were practically useless, others were simply too large, the list goes on.
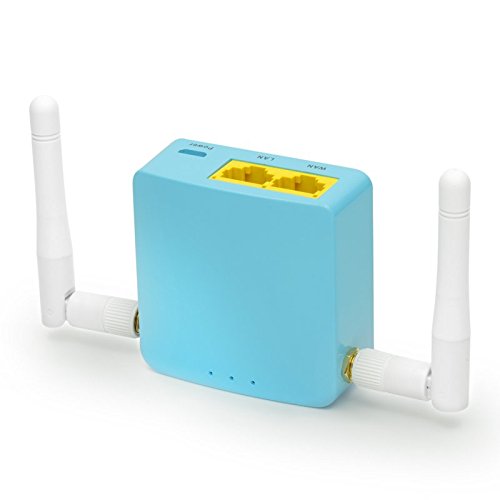
Almost ready to give up on the project, I discovered the GL-MT300A – a tiny Linux / OpenWRT powered cube for around $35. The list of built-in features is impressive. But I need it for only one thing – a small, USB powered wifi client-mode bridge.
 I had high hopes – given the fact it ran OpenWRT along with the LUCI web interface – that I’d be able to do practically whatever I want through a nice GUI.
Unfortunately I was unable to create a working bridged repeater setup due to a limitation in this particular (MediaTek) hardware. Apparently, only Broadcom hardware can natively bridge between wired and wireless networks.
With some google-fu, I discovered an open-source ‘software fix’ for this hardware limitation called ‘relayd’. It’s available through the built-in package manager and can be installed with a few clicks.
Here are the resulting specifications:
- WIFI bridged repeater to the physical WAN port (my only ‘must have’)
- WIFI routed repeater to physical LAN port and WIFI hotspot (NAT, administration). You could also put the LAN/hotspot in bridged mode but it requires several more steps and changes that I do not cover it in this tutorial.
- Manage WIFI networks list and hotspot settings through the ‘basic’ (non-LUCI) GUI.
I attribute the following steps to more detailed information gathered here and here, adapted to the firmware and GUI on this particular hardware:
- Connect laptop or PC to the LAN port, and perform a factory reset (hold reset button for at least 10 seconds)
- Log into 192.168.8.1 with a browser and do the initial setup.
- Standard GUI -> In WAN setup – Set to ‘repeater’ mode and join a network. Wait at least a minute for the connection to come fully online before the next step.
- Standard GUI -> Make sure you are on the latest firmware (v2.22 as of this writing). Do another factory reset after flashing it.
- Standard GUI -> Go into ‘app repo’ (wait for the packages to populate), seach for “relayd” and install both packages which appear. The GUI will show ‘error status 255’ each time but don’t worry, it worked.
- Advanced GUI -> Network -> Interfaces – Delete WAN6 (this interface is unneccesary/redundant after we repurpose the WAN port).
- Advanced GUI -> Network -> Interfaces – Edit WAN and change protocol to ‘Static’ and set the IP address to an IP on a random unused subnet – I used 192.168.168.1 / 255.255.255.0. Also (VERY important) – go to physical settings and create a bridge between VLAN interface eth0.2 (WAN) and the Wireless Network Client.
- Advanced GUI -> Network -> Interfaces – Create an interface called ‘stabridge’ with type set to ‘Relay Bridge’. On the next page, set the IP address to the IP you used in the previous step (192.168.168.1 in this case), and select the WAN and WWAN interfaces for relaying.
- Advanced GUI -> System -> Startup -> Disable and stop ‘firewall’ and ‘firewall_gl’ services
- Advanced GUI -> System -> Startup -> Enable and ‘restart’ relayd
At this point you can plug into the WAN port and receive a DHCP IP from your primary router, as we expect in ‘bridged repeater’ mode. Relayd handles the broadcast/DHCP traffic exchange between your wireless network and the WAN port. If you plug into the LAN port or connect to the WIFI hotspot (routed repeater), you’ll receive an IP in the 192.168.8.x range from the GL-MT300A’s built-in DHCP server and your traffic will be routed using NAT.
I’ve found using the LAN port (or WIFI hotspot) is an easy way access the GUI to change WIFI networks or other settings since the management IP will always be 192.168.8.1. NOTE: You can access the GUI on the upstream network or WAN port by going to the WWAN’s IP address in your browser. However keep in mind the WWAN IP is assigned by DHCP, so you should consider using a static DHCP reservation upstream.
To change the WIFI network just repeat step 3. I’ve discovered that the device will remember all network connections and automatically connect to to the best available, and you can edit the list in the basic GUI as well.
To manage the hotspot, go into the standard GUI and toggle the ‘switch’ to enable/disable or click on the WIFI icon to change the settings. NOTE: Disabling the hotspot causes latency and packet loss due to a bug in the custom firmware, which constantly tries to ‘bring up’ the disabled interface. Killing off ‘gl_health’ fixes the latency and syslog errors, however, the wifi client will no longer auto-connect which basically renders the device useless.
One other thing I’ve noticed is the device regularly ‘phones home’ to gl-inet.com and several other sites for firmware checks and dynamic DNS service. There is no way to disable this in either GUI nor in any configuration files. To stop the unneccesary requests, you can chmod ‘000’ the following files using SSH to prevent their execution:
root@GL-MT300A:~# chmod 000 /usr/lib/ddns/glddnsupdater.sh
root@GL-MT300A:~# chmod 000 /usr/bin/glautoupdater
Lastly, it should go without saying: the firewall is completely disabled so this should ONLY be used in trusted, private network environments. NEVER allow this configuration to be openly reachable from the internet (e/g using as a travel router) without re-enabling the firewall and carefully setting up the rules. I use these only in private/trusted networks so I haven’t spent time on firewall configuration testing.
Hi
Great How To, worked a treat until after a reboot… 🙁
This was with a GL-MT300N Firmware 2.25. After some troubleshooting, the issue was with the firewall being reloaded via the miniupnpd service, disabling this service enabled the settings to survive a reboot.
Thanks for the comment. To be honest, I have alot of issues with the bridge going down after some time, usually after a long period of inactivity or PC going to sleep, ect. Reboot of the GL always brings it back. I have never had it not work after a reboot. Have you seen this happen yet?
Hi
Haven’t had it up for long enough yet, I’ve rebooted multiple nows as part of testing and all has been good.
I have it connected to Raspberry Pi3’s via a 5V hub so everything is running off one multiport power pack.
Hi Randy,
thanks for your article. I think it saved me a lot of headache:-) I used 2.26.1
My bridges will not run for more than 12 hours so the “going down” problem should be no problem for me.
Ralf
Are the antenna one transmit and one recv ? If so please provideWant to use as a repeater and use a tagging.