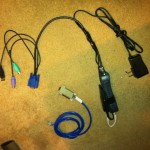
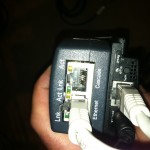
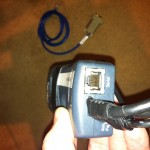
Spider KVM’s are already very cool as they are — KVM, virtual media, and serial console with a flawless web/Java client. But if you strap on a Wifi bridge, it’s way cooler. As a bonus you get wireless network access via the Cascade port — anyone who has done an emergency router or switch replacement should know how much of a life saver this could be.
Set DNS and Default Route in PFSense from Console
Permanently? Not so easy. Temporarily, easy.
echo "nameserver x.x.x.x" > /etc/resolv.conf
route add default y.y.y.y
Where x.x.x.x is your DNS and y.y.y.y is your gateway.
Once you’re in the GUI, fix up the settings properly and you’re good.
Fixing default console resolution in Ubuntu
In recent releases of Ubuntu (at least 10.x) by default the non-graphical console attempts to use the max possible resolution supported by the connected monitor. Other than being hard on the eyes, this can cause issues with some KVM units and even more issues for headless machines that need to be troubleshooted with a crash cart. The worst result is ‘unsupported video mode’ displayed on the monitor or KVM which only a full reboot can fix.
The solution is to edit /etc/default/grub. Change the GRUB_CMDLINE_LINUX_DEFAULT line (9th line or so) to be the following:
GRUB_CMDLINE_LINUX_DEFAULT="nomodeset vga=768"Then issue the following command and reboot:
update-grubThe mysterious /tmp/.tmp folder
If LFD reports a /tmp/.tmp folder on your server you have been hit with the latest timthumb.php hack, which is circulating among wordpress sites which dodged the first mass infection last August for unknown reasons. The /tmp/.tmp folder contains a list of firefox visitor IP’s who have visited your site and were exposed to malicious javascript triggering flash and reader vulnerabilities in an attempt to install a fakeAV scanner (which easily succeeds for users without a good antivirus to catch it). It uses both cookies and the IP list to prevent the code from appearing more than once per visitor, and only appears for firefox users, making the injected code very difficult to track down. Another file contains a cached copy of obfuscated javascript code which is presented to the victims and re-downloads/changes often. A random php include file in wp-includes in wordpress is injected with code that makes all of this work. The infected wordpress file modification date remains unchanged, making it very difficult to find unless you know exactly what to look for.
First, you need to make sure all timthumbs are up to date — if you’re not using Cpanel modify the following script appropriately, otherwise run it as is:
http://djlab.com/2012/01/auto-find-update-timthumb-php-instances-on-cpanel/
Find the infected php file which you need to clean up:
cd /home/username/public_html
grep "<\?php.{2,15} = array" * -REl --include=*.php
Then, look for any other back doors which may be laying around and either clean or remove the files. Open each file and review manually before cleaning/deleting, as there may be false positives:
http://djlab.com/2010/09/finding-php-shell-scripts-and-php-exploits/
Finally remove the /tmp/.tmp folder and update wordpress and every theme and plugin. Remove any unused plugins or themes because these can still be hacked into.
MDADM Cheat Sheet
This info is taken from here.
1. Create a new RAID array
Create (mdadm –create) is used to create a new array:
mdadm --create --verbose /dev/md0 --level=1 /dev/sda1 /dev/sdb2
or using the compact notation:
mdadm -Cv /dev/md0 -l1 -n2 /dev/sd[ab]1
2. /etc/mdadm.conf
/etc/mdadm.conf or /etc/mdadm/mdadm.conf (on debian) is the main configuration file for mdadm. After we create our RAID arrays we add them to this file using:
mdadm --detail --scan >> /etc/mdadm.conf
or on debian
mdadm --detail --scan >> /etc/mdadm/mdadm.conf
3. Remove a disk from an array
We can’t remove a disk directly from the array, unless it is failed, so we first have to fail it (if the drive it is failed this is normally already in failed state and this step is not needed):
mdadm --fail /dev/md0 /dev/sda1
and now we can remove it:
mdadm --remove /dev/md0 /dev/sda1
This can be done in a single step using:
mdadm /dev/md0 --fail /dev/sda1 --remove /dev/sda1
4. Add a disk to an existing array
We can add a new disk to an array (replacing a failed one probably):
mdadm --add /dev/md0 /dev/sdb1
5. Verifying the status of the RAID arrays
We can check the status of the arrays on the system with:
cat /proc/mdstat
or
mdadm --detail /dev/md0
The output of this command will look like:
cat /proc/mdstat Personalities : [raid1] md0 : active raid1 sdb1[1] sda1[0] 104320 blocks [2/2] [UU] md1 : active raid1 sdb3[1] sda3[0] 19542976 blocks [2/2] [UU] md2 : active raid1 sdb4[1] sda4[0] 223504192 blocks [2/2] [UU]here we can see both drives are used and working fine – U. A failed drive will show as F, while a degraded array will miss the second disk –
Note: while monitoring the status of a RAID rebuild operation using watch can be useful:
watch cat /proc/mdstat
6. Stop and delete a RAID array
If we want to completely remove a raid array we have to stop if first and then remove it:
mdadm --stop /dev/md0

mdadm --remove /dev/md0
and finally we can even delete the superblock from the individual drives:
mdadm --zero-superblock /dev/sda
Finally in using RAID1 arrays, where we create identical partitions on both drives this can be useful to copy the partitions from sda to sdb:
sfdisk -d /dev/sda | sfdisk /dev/sdb
(this will dump the partition table of sda, removing completely the existing partitions on sdb, so be sure you want this before running this command, as it will not warn you at all).
There are many other usages of mdadm particular for each type of RAID level, and I would recommend to use the manual page (man mdadm) or the help (mdadm –help) if you need more details on its usage. Hopefully these quick examples will put you on the fast track with how mdadm works.
Automatically update all vulnerable timthumb files on Cpanel
timthumb.php is responsible for millions of wordpress hacking so it is important to make sure all timthumb files on Cpanel servers are up to date. It may have any file name (sometimes thumb.php or another) so we have to look in every php file for vulnerable versions and replace them. The script automates this. This can also run as a cron job.
It can take a very long time on busy servers, maybe hours. Be patient, when it finishes, it will list all fixed files.
This script is for Cpanel servers only
wget http://djlab.com/stuff/timthumb-updater-cpanel.sh -O ~/timthumb-updater-cpanel.sh
chmod +x ~/timthumb-updater-cpanel.sh
~/./timthumb-updater-cpanel.shTest IOPS and disk throughput in Linux
Excellent article on testing IOPS and throughput of Linux disks and filesystems.
https://www.linux.com/learn/tutorials/442451-inspecting-disk-io-performance-with-fio
PHP IPv4 and IPv6 Network and Subnet Calculator
Just threw together a quick and dirty PHP-based subnet calculator. What sets this one apart from others is that it works with both IPv4 and IPv6 inputs and has subnet splitting capability.
Use the first field to enter a network to get details about. The format is CIDR notation ‘1.2.3.4/22’.
Use the second field to split the first network into smaller networks. The notation is ‘/24’. The network must be smaller than the 1st one obviously. Click any of the smaller subnets to show details.
http://djlab.com/stuff/ipcalc.php
Source code is on github:
MegaRAID Storage Manager on Ubuntu for LSI cards
Getting MegaRAID Storage Manager and CLI tools installed on Ubuntu is no fun. This is what worked for me:
echo "deb http://hwraid.le-vert.net/debian squeeze main" >> /etc/apt/sources.list
apt-get update
apt-get -y --force-yes install megacli megactl libc6-i386 lib32gcc1 lib32z1 lib32stdc++6 ia32-libs lib32icu42
wget http://djlab.com/stuff/libstdc++5_3.3.6-21ubuntu1_amd64.deb
dpkg -i libstdc++5_3.3.6-21ubuntu1_amd64.deb
wget http://djlab.com/stuff/libstdc++5_3.3.6-21ubuntu1_i386.deb
dpkg-deb -x libstdc++5_3.3.6-21ubuntu1_i386.deb lib32stdc++5
cp ./lib32stdc++5/usr/lib/libstdc++.so.5.0.7 /usr/lib32
ln -s /usr/lib32/libstdc++.so.5.0.7 /usr/lib32/libstdc++.so.5
wget http://djlab.com/stuff/libxerces-c28_2.8.0+deb1-2build1_i386.deb
dpkg-deb -x libxerces-c28_2.8.0+deb1-2build1_i386.deb lib32xerces-c28
mkdir -p /opt/lsi/Apache/
cp ./lib32xerces-c28/usr/lib/libxerces-c.so.28.0 /opt/lsi/Apache/
ln -s /opt/lsi/Apache/libxerces-c.so.28.0 /opt/lsi/Apache/libxerces-c.so.28
ln -s /opt/lsi/Apache/libxerces-c.so.28 /usr/lib/libxerces-c.so.28
ldconfig

wget https://djlab.com/stuff/megaraid-storage-manager_8.10-04_amd64.deb
dpkg -i megaraid-storage-manager_8.10-04_amd64.deb

wget http://djlab.com/stuff/getlibs-all.deb
dpkg -i getlibs-all.deb
getlibs -y -l libxerces-c.so.28 libicuuc.so.42
ldconfig

## Launch GUI (make sure X11 forwarding is enabled on SSH session):
## /usr/local/MegaRAID\ Storage\ Manager/startupui.sh
Now you can monitor and manage many different LSI SAS cards (including Dell Perc and some others).
Using badblocks to test and wipe disks
Non destructive (read only) test, optimized for 1G RAM:
badblocks -b 4096 -c 98304 -p 0 -s /dev/sdaDestructive read/write test (use caution!):
badblocks -b 4096 -c 98304 -p 0 -w -s /dev/sda

